The natural next step in this project was to add remote control. I decided to build it all from scratch, even semi-designing my own radio protocol.
The finished remote controller

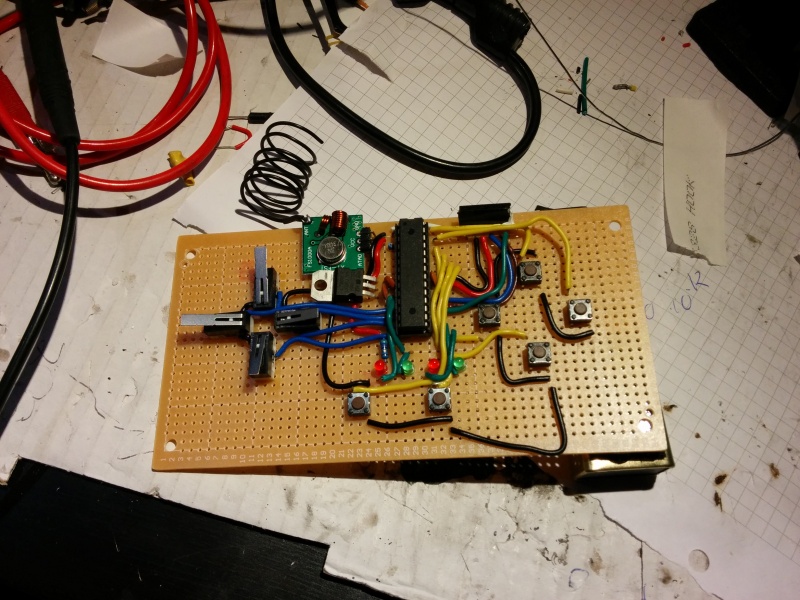
I started by laying out the buttons on the board. The left buttons control movement,and the right buttons control the turret.

Indicator LEDs and a socket for the AVR was added, along with a 6 pin JTAG connector(top right) and a 5V regulator.

Most components mounted. The RF transmitter is the green thing on the left. The MCu used the ATMEGA 168

The backside

Completed with 9v battery connector

Battery and on/off switch. battery is mounted with velcro

All done!

Added a control surface to the left buttons, to be able to push two buttons simultaneously.
About the radio protocol used.
I based it on the Manchester encoding Nexa uses for light control, which i also use in the light automation system. Info on that can be found here.
I use the same method to send 1’s and 0’s, but i structure the bits differently. A packet is 28 bits, build up in this manner:
- 8 bit receiver ID
- 12 bit command. One bit for each button, either being pushed or not(1 or 0). The last two are extra bit for easy expansion.
- 8 bit checksum. This is to check if the packet has errors. The checksom is simply (command XOR ID).
The code on the receiving end runs two tests on the received packet. It checks if the ID corresponds with its own, and if the received checksum is the same as the one it generates itself using the received ID and command.
All my code is now on github, in this repo.

Battery added in the front. This messed up the center of gravity badly! The battery is a 2,2 Ah LiPo battery from hobbyking.com

Looks neat, but very unstable

Weighing in at almost 900g

The 433 receiver. The decoupling cap helped alot with power noise.
About noice
I have struggled a lot with motor noise disabling the radio connection. Decoupling capacitors between 5V and GND on all components improved things. Having motors and radio components on two separate power cicuits was problably the most important change i made. I hope that new power supplies will further improve noise conditions inside the tank.

Battery attached under the tank with velcro. The center of gravity is now both low and centered!

Backside with battery cables, on/off switch and 12v connector.

The soon to be replaced bread board power supply. These voltage regulators are designed for half the current i am using for the motors. The breadboard makes a lot of noice in the power circuit.

Stepper controller(bottom), servo controller(left), main MCU(middle),Power supply(top right), servo’s(right)
Video of the performance. I have some issues with one of the tracks beeing too lose. I also struggle a bit with noise from the motors interfering with the radio signals.
Future work (from first post)
Rotation turret with gun. I may include some auto targeting based on sound or IR detection.Remote control. I plan to use the same RF equipment as in my home automation post.- Autonomous control. Install range detection and/or camera to make it able to navigate by itself. (i plan to add a raspberry pi with camera and control it trough the internet)
- Quadrotor setup for aerial maneuvering. I will also implement a regulator which makes it able to hover in place. (motors and ESC has been ordered, stay tuned)

How to Make a Cardboard Tank :))
http://pogodnyczas.blogspot.com/2014/06/czog-z-tektury.html